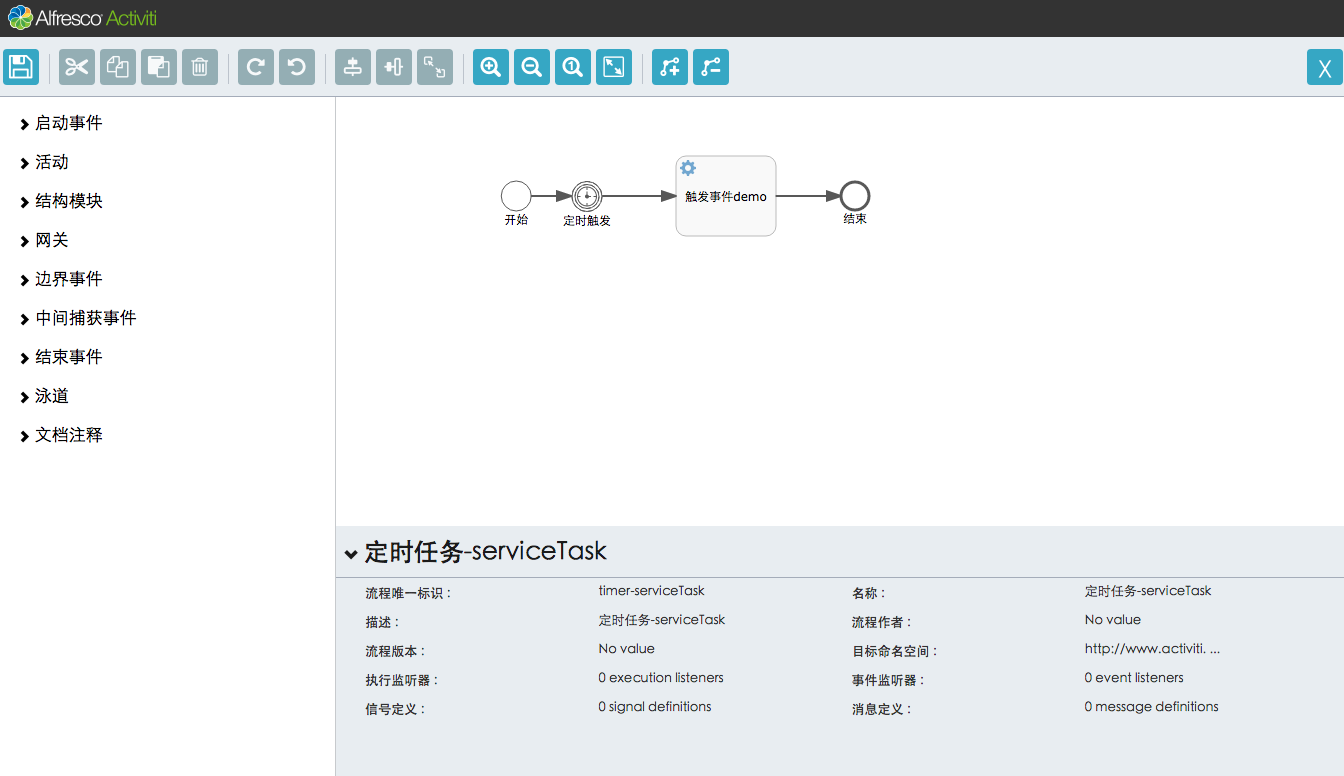
目前activiti提供的Activiti Modeler有两套,从Activiti5.17后,发布了新的Activiti Modeler组件。本文主要介绍如何在项目中集成最新的Activiti Modeler.
新版的效果

相比于上一版,个人感觉更加的简洁,优美。并且在Activiti5.20后,完善了很多上版本的bug。
Activiti Modeler内部的实现上还是以oryx为图形组件为内核,用angular.js作为界面基本元素的基础组件以及调度oryx的API。
Activiti explorer的集成方式
首先,从github下载Activiti源码.在第一章已经列出具体地址:https://github.com/Activiti/Activiti
Activiti Exploer的内部结构-Java
1
2
3
4
5
6
7
8
9
10
11
12
13
14
15
16
17
18
19
20
21
22
23
24
25
26
27
| ├── assembly
├── java
│ └── org
│ └── activiti
├── resources
│ └── org
│ └── activiti
└── webapp
├── META-INF
├── VAADIN
│ ├── themes
│ └── widgetsets
├── WEB-INF
├── diagram-viewer
│ ├── images
│ └── js
└── editor-app
├── configuration
├── css
├── editor
├── fonts
├── i18n
├── images
├── libs
├── partials
├── popups
└── stencilsets
|
我们需要关注的目录是webapp/editor-app,以及java/org/activiti
新版的Activiti Explorer放弃了XML方式的配置,采用Bean configuration的方式代替。
在org/activiti/explore/conf包中就是各种的配置代码,在org/activiti/explore/servlet/WebConfigurer类采用Servlet方式配置Servlet映射关系,映射路径为/service/*
Activiti Exploer的内部结构-Web
新版本Activiti Modeler的Web资源不再像旧版那么散乱,新版本只需要关注:
- src/main/webapp/editor-app:目录中包含设计器里面所有的资源:angular.js、oryx.js以及配套的插件及css
- src/main/webapp/modeler.html:设计器的主页面,用来引入各种web资源
- src/main/resources/stencilset.json: bpmn标准里面各种组件的json定义,editor以import使用。
与项目的实际整合
Activiti Rest接口与Spring MVC配置
Maven依赖
Activiti Modeler对后台服务的调用通过Spring MVC方式实现,所有的Rest资源统一使用注解RestController标注,所以在整合到自己项目的时候需要依赖Spring MVC,Modeler模块使用的后台服务都存放在activiti-modeler模块中,在自己的项目中添加依赖:
1
2
3
4
5
6
7
8
9
10
| <dependency>
<groupId>org.activiti</groupId>
<artifactId>activiti-modeler</artifactId>
<version>5.19.0</version>
</dependency>
<dependency>
<groupId>org.activiti</groupId>
<artifactId>activiti-diagram-rest</artifactId>
<version>5.19.0</version>
</dependency>
|
模块作用:
- activiti-modeler模块提供模型先关的操作:创建、保存、转换json与xml格式等
- activiti-diagram-rest模块用来处理流程图有关的功能:流程图布局(layout)、节点高亮等
准备基础服务类
复制文件(hhttps://github.com/whatlookingfor/workfocus/tree/master/src/main/java/org/activiti/explorer) 里面的java文件到自己项目中。(参考咖啡兔的工作流代码)
Activiti Spring配置
1
2
3
4
5
6
7
8
9
10
11
12
13
14
15
16
17
18
19
20
21
22
23
24
25
26
27
28
29
30
31
32
33
34
35
36
37
38
39
40
41
42
43
| <context:component-scan
base-package="org.activiti.conf,org.activiti.rest.editor,org.activiti.rest.service">
<context:exclude-filter type="annotation" expression="org.springframework.stereotype.Controller"/>
</context:component-scan>
<bean id="objectMapper" class="com.fasterxml.jackson.databind.ObjectMapper"/>
<bean id="processEngineConfiguration" class="org.activiti.spring.SpringProcessEngineConfiguration">
<property name="dataSource" ref="dataSource" />
<property name="transactionManager" ref="transactionManager" />
<property name="databaseSchemaUpdate" value="true" />
<property name="jobExecutorActivate" value="true" />
<property name="history" value="full" />
<property name="processDefinitionCacheLimit" value="10"/>
<property name="activityFontName" value="${activiti.diagram.activityFontName}"/>
<property name="labelFontName" value="${activiti.diagram.labelFontName}"/>
</bean>
<bean id="processEngine" class="org.activiti.spring.ProcessEngineFactoryBean">
<property name="processEngineConfiguration" ref="processEngineConfiguration" />
</bean>
<bean id="repositoryService" factory-bean="processEngine" factory-method="getRepositoryService" />
<bean id="runtimeService" factory-bean="processEngine" factory-method="getRuntimeService" />
<bean id="formService" factory-bean="processEngine" factory-method="getFormService" />
<bean id="identityService" factory-bean="processEngine" factory-method="getIdentityService" />
<bean id="taskService" factory-bean="processEngine" factory-method="getTaskService" />
<bean id="historyService" factory-bean="processEngine" factory-method="getHistoryService" />
<bean id="managementService" factory-bean="processEngine" factory-method="getManagementService" />
<bean id="restResponseFactory" class="org.activiti.rest.service.api.RestResponseFactory" />
<bean id="contentTypeResolver" class="org.activiti.rest.common.application.DefaultContentTypeResolver" />
|
Spring MVC配置
创建文件spring-mvc-rest.xml:
1
2
3
4
5
6
7
8
9
10
11
12
13
14
15
| <?xml version="1.0" encoding="UTF-8"?>
<beans xmlns="http://www.springframework.org/schema/beans" xmlns:xsi="http://www.w3.org/2001/XMLSchema-instance"
xmlns:context="http://www.springframework.org/schema/context"
xmlns:mvc="http://www.springframework.org/schema/mvc"
xsi:schemaLocation="http://www.springframework.org/schema/beans http://www.springframework.org/schema/beans/spring-beans-3.1.xsd
http://www.springframework.org/schema/context http://www.springframework.org/schema/context/spring-context-3.1.xsd
http://www.springframework.org/schema/mvc http://www.springframework.org/schema/mvc/spring-mvc-3.1.xsd">
<context:component-scan base-package="org.activiti.rest.editor,org.activiti.rest.diagram">
<context:include-filter type="annotation" expression="org.springframework.stereotype.Controller" />
</context:component-scan>
<mvc:annotation-driven />
</beans>
|
web.xml配置Servlet服务
在web.xml中配置下面的Servlet
1
2
3
4
5
6
7
8
9
10
11
12
13
| <servlet>
<servlet-name>ModelRestServlet</servlet-name>
<servlet-class>org.springframework.web.servlet.DispatcherServlet</servlet-class>
<init-param>
<param-name>contextConfigLocation</param-name>
<param-value>/WEB-INF/spring-mvc-modeler.xml</param-value>
</init-param>
<load-on-startup>1</load-on-startup>
</servlet>
<servlet-mapping>
<servlet-name>ModelRestServlet</servlet-name>
<url-pattern>/service/*</url-pattern>
</servlet-mapping>
|
添加JSONP的过滤器
1
2
3
4
5
6
7
8
| <filter>
<filter-name>JSONPFilter</filter-name>
<filter-class>org.activiti.explorer.JsonpCallbackFilter</filter-class>
</filter>
<filter-mapping>
<filter-name>JSONPFilter</filter-name>
<url-pattern>/*</url-pattern>
</filter-mapping>
|
模型设置器web资源的整合
直接从Activiti Explorer中复制文件modeler.html文件到src/main/webapp目录即可,该文件会引入定义基本的布局(div)、引入css以及js文件。
修改editor-app/app-cfg.js文件的contextRoot属性为自己的应用名称,例如**/项目名/service**
我个人是在webapp下创建了个activiti的文件夹,然后一股脑把上面的文件全部扔进去。不一定需要直接放到webapp下,注意路径即可。
模型控制器
- create方法中在创建完Model后跳转页面为modeler.html?modelId=
- 当从模型列表编辑某一个模型时也需要把路径修改为modeler.html?modelId=
如果像我上面放到activiti文件夹下,此处注意需要修改对应的路径。
整合Activiti Rest
maven依赖
1
2
3
4
5
| <dependency>
<groupId>org.activiti</groupId>
<artifactId>activiti-rest</artifactId>
<version>5.19.0</version>
</dependency>
|
activiti组件包扫描
在activiti的Spring配置文件中增加org.activiti.rest.service包的扫描,具体如下(在上面已经加了进来,此步骤可以忽略。):
1
2
3
4
| <context:component-scan
base-package="org.activiti.conf,org.activiti.rest.editor,org.activiti.rest.service">
<context:exclude-filter type="annotation" expression="org.springframework.stereotype.Controller"/>
</context:component-scan>
|
添加Rest安全认证组件
1
2
3
4
5
6
7
8
9
10
11
12
13
14
15
16
17
18
19
20
21
22
23
24
25
26
27
28
29
30
31
32
33
34
| package org.activiti.conf;
import org.activiti.rest.security.BasicAuthenticationProvider;
import org.springframework.context.annotation.Bean;
import org.springframework.context.annotation.Configuration;
import org.springframework.security.authentication.AuthenticationProvider;
import org.springframework.security.config.annotation.web.builders.HttpSecurity;
import org.springframework.security.config.annotation.web.configuration.EnableWebSecurity;
import org.springframework.security.config.annotation.web.configuration.WebSecurityConfigurerAdapter;
import org.springframework.security.config.annotation.web.servlet.configuration.EnableWebMvcSecurity;
import org.springframework.security.config.http.SessionCreationPolicy;
@Configuration
@EnableWebSecurity
@EnableWebMvcSecurity
public class SecurityConfiguration extends WebSecurityConfigurerAdapter {
@Bean
public AuthenticationProvider authenticationProvider() {
return new BasicAuthenticationProvider();
}
@Override
protected void configure(HttpSecurity http) throws Exception {
http.authenticationProvider(authenticationProvider())
.sessionManagement().sessionCreationPolicy(SessionCreationPolicy.STATELESS).and()
.csrf().disable()
.authorizeRequests()
.anyRequest().authenticated()
.and()
.httpBasic();
}
}
|
Sping mvc配置文件
创建文件spring-mvc-rest.xml:
1
2
3
4
5
6
7
8
9
10
11
12
13
14
15
| <?xml version="1.0" encoding="UTF-8"?>
<beans xmlns="http://www.springframework.org/schema/beans" xmlns:xsi="http://www.w3.org/2001/XMLSchema-instance"
xmlns:context="http://www.springframework.org/schema/context"
xmlns:mvc="http://www.springframework.org/schema/mvc"
xsi:schemaLocation="http://www.springframework.org/schema/beans http://www.springframework.org/schema/beans/spring-beans-3.1.xsd
http://www.springframework.org/schema/context http://www.springframework.org/schema/context/spring-context-3.1.xsd
http://www.springframework.org/schema/mvc http://www.springframework.org/schema/mvc/spring-mvc-3.1.xsd">
<context:component-scan base-package="org.activiti.rest">
<context:include-filter type="annotation" expression="org.springframework.stereotype.Controller" />
</context:component-scan>
<mvc:annotation-driven />
</beans>
|
配置Servlet映射
1
2
3
4
5
6
7
8
9
10
11
12
13
| <servlet>
<servlet-name>RestServlet</servlet-name>
<servlet-class>org.springframework.web.servlet.DispatcherServlet</servlet-class>
<init-param>
<param-name>contextConfigLocation</param-name>
<param-value>/WEB-INF/spring-mvc-rest.xml</param-value>
</init-param>
<load-on-startup>1</load-on-startup>
</servlet>
<servlet-mapping>
<servlet-name>RestServlet</servlet-name>
<url-pattern>/rest/*</url-pattern>
</servlet-mapping>
|
访问Rest接口
现在启动应用可以访问 http://localhost:8080/your-app/rest/management/properties 以Rest方式查看引擎的属性列表.
整合过程中的某些优化
- 去掉Activiti Afresco的logo标题栏,并且把样式上的空白栏去掉
修改modeler.html中的以下内容,注意不要把该文本删除,建议加style=”display:none”,删除后其会造成底层下的一些内容有40个像数的东西显示不出来。
1
2
3
4
5
6
7
| <div class="navbar navbar-fixed-top navbar-inverse" role="navigation" id="main-header">
<div class="navbar-header">
<a href="" ng-click="backToLanding()" class="navbar-brand"
title="{{'GENERAL.MAIN-TITLE' | translate}}"><span
class="sr-only">{{'GENERAL.MAIN-TITLE' | translate}}</span></a>
</div>
</div>
|
在editor-app/css/style-common.css中,把以下样式的padding-top部分改为0px;
1
2
3
4
5
6
| .wrapper.full {
padding: 40px 0px 0px 0px;
overflow: hidden;
max-width: 100%;
min-width: 100%;
}
|
在modeler.html中加上CloseWindow的函数,默认编辑器关闭后是加载项目主页的,以下代码是直接关闭该tab页面。
1
2
3
4
5
6
| <script type="text/javascript">
function CloseWindow(action) {
if (window.CloseOwnerWindow) return window.CloseOwnerWindow(action);
else window.close();
}
</script>
|
在editor-app/configuration/toolbar-default-actions.js中,修改以下代码,注释为原有代码
1
2
3
4
| closeEditor: function(services) {
CloseWindow('ok');
},
|
1
2
3
4
5
6
| $scope.saveAndClose = function () {
$scope.save(function() {
CloseWindow('ok');
});
};
|
